
Kiritsuke technique guide
How to Use a Kiritsuke Knife Safely and Effectively
Learn the correct grip, stance, push cut, draw slice and precision tip technique for a kiritsuke. This practical guide also explains what the blade should—and should not—be used to cut.
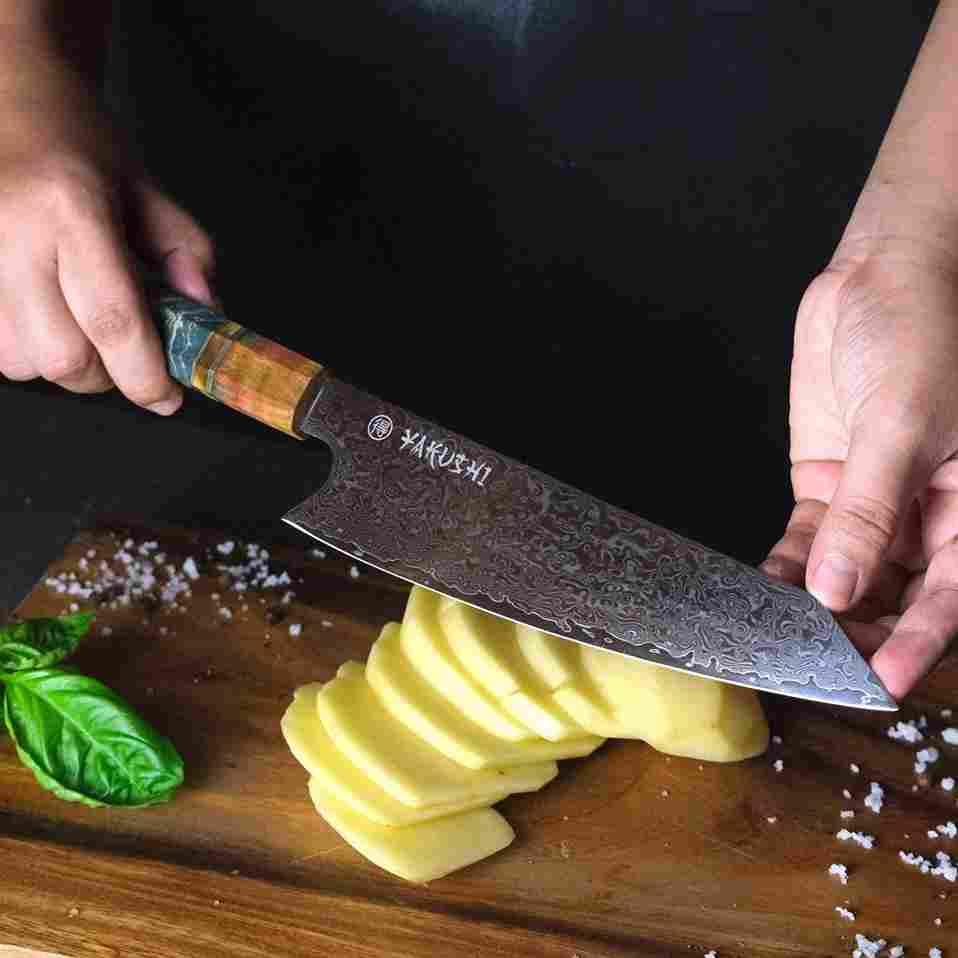
A kiritsuke rewards deliberate technique. Its long blade, relatively flat cutting edge and sharply angled K-tip make it especially useful for clean vegetable cuts, long draw slices and detailed trimming. Those same features make rocking, twisting and heavy-duty chopping poor choices.
The term kiritsuke can describe two related but different knives. A traditional kiritsuke is generally a specialized single-bevel Japanese knife. Many modern knives sold as kiritsuke knives are double-bevel kiritsuke-style gyutos, combining an all-purpose gyuto profile with an angled K-tip. Check the specifications of your particular knife before using or sharpening it.
Identify your blade first
Traditional Kiritsuke vs Kiritsuke-Style Gyuto
The correct cutting and sharpening approach depends on which version you own.
| Feature | Traditional kiritsuke | Kiritsuke-style gyuto |
|---|---|---|
| Edge | Usually single bevel | Usually double bevel |
| Typical use | Specialized vegetable and fish preparation | General vegetable and boneless protein preparation |
| Handling | May steer during a cut and requires practiced control | More familiar to cooks accustomed to double-bevel knives |
| Sharpening | Requires a bevel-specific sharpening method | Sharpened on both sides according to its intended geometry |
| Best owner | Experienced user seeking a specialized blade | Home cook wanting a versatile K-tip knife |
Start with control
Grip, Guiding Hand and Stance
A stable position matters more than speed, especially with a long, pointed blade.
Use a pinch grip
Pinch the blade near the handle between your thumb and index finger. Wrap the remaining fingers comfortably around the handle.
Relax your hand
Use enough pressure to control the blade without squeezing. Excessive tension reduces precision and causes fatigue.
Form a claw
Curl the fingertips of your guiding hand behind the knuckles. Advance the food only after each cut is completed.
Stand comfortably
Keep your shoulders relaxed and give the long blade enough room to travel without contacting dishes, appliances or other objects.
Core blade movements
Three Essential Kiritsuke Techniques
Let the shape of the blade determine the movement. Do not force it to behave like a deeply curved Western chef knife.
Push Cutting
Forward and down, followed by a clean lift.
Push cutting works well with the kiritsuke’s flatter edge. The blade moves slightly forward as it descends through the food, then lifts clear of the board before the next cut.
- Create a stable, flat surface on round vegetables.
- Place the forward portion of the edge on the ingredient.
- Move the blade forward and down in one controlled stroke.
- Finish the cut without striking the board forcefully.
- Lift the blade and reset for the next piece.
Draw Slicing
A long, smooth pull instead of short sawing strokes.
Draw slicing uses the kiritsuke’s blade length to produce a smooth cut. Begin nearer the heel or middle of the edge and draw the knife through the ingredient toward the tip.
- Place the protein on a clean, stable cutting surface.
- Position the edge near the heel or middle of the blade.
- Draw the knife through with light downward pressure.
- Use as much blade length as the ingredient requires.
- Avoid repeated back-and-forth sawing.
Precision Tip Work
Controlled trimming, scoring and delicate incisions.
The angled K-tip gives the kiritsuke a precise point for detailed preparation. Its narrow geometry also makes it more vulnerable to damage than the heel of the blade.
- Keep the ingredient firmly supported on the board.
- Use the tip for shallow, deliberate cuts.
- Move the blade in the direction of the cutting edge.
- Keep sideways pressure off the point.
- Lift the tip free before repositioning the ingredient.
For another professional demonstration of slicing, dicing and julienne, see the Institute of Culinary Education knife-skills guide.
Practical exercise
How to Practice Vegetable Cuts
This progression develops control without requiring speed or complicated decorative techniques.
Choose a manageable ingredient
Start with cucumber, zucchini or a peeled potato. Avoid very hard, irregular produce during your first practice sessions.
Create a stable base
Trim one side when necessary so the ingredient rests flat instead of rolling beneath the blade.
Cut even slabs
Use slow push cuts to create slabs of similar thickness. Keep the blade approximately perpendicular to the board.
Turn the slabs into batons
Stack only as many slabs as you can control safely. Cut them into strips with the same approximate width.
Cross-cut into dice
Rotate the batons and cut across them. Use your guiding knuckles as a visual spacing reference.
Inspect before cooking
Compare several pieces. Concentrate on repeatability during the next batch rather than trying to work faster.
Protect the edge and tip
What Not to Cut With a Kiritsuke
A kiritsuke is a precision kitchen knife, not a cleaver, pry bar or frozen-food cutter.
Appropriate tasks
- Slicing and dicing vegetables
- Julienne and controlled push cuts
- Slicing boneless meat and poultry
- Portioning boneless fish fillets
- Chopping herbs with controlled strokes
- Fine trimming and shallow scoring
Tasks to avoid
- Cutting through bones or joints
- Cutting frozen food
- Opening shells or hard packaging
- Twisting the blade inside an ingredient
- Prying with the pointed tip
- Cutting on glass, stone or ceramic surfaces
Choose the right movement
Kiritsuke Tasks and Techniques
| Kitchen task | Recommended movement | Best blade area | Avoid |
|---|---|---|---|
| Vegetable dice | Controlled push cut | Heel and middle | Forceful rocking |
| Julienne vegetables | Forward-and-down push cut | Middle portion | Overly tall, unstable stacks |
| Herbs | Light slicing or limited controlled chop | Middle and forward edge | Crushing with repeated heavy passes |
| Cooked boneless meat | Long draw slice | Heel through tip | Short sawing strokes |
| Boneless fish portions | Smooth draw slice | Maximum usable blade length | Cutting through hard bones |
| Scoring or trimming | Shallow, controlled tip movement | K-tip | Sideways force or twisting |
Correct common problems
Kiritsuke Technique Troubleshooting
The blade does not cut cleanly
Reduce downward force and try a smoother forward or drawing movement. If the edge still crushes or tears food, it may require sharpening.
Food sticks to the blade
Food release depends on ingredient moisture, blade finish and cutting technique. Slightly adjust the direction of the cut and clear food from the blade safely between batches.
Pieces vary in thickness
Slow down, establish a flat surface and use the first piece as a visual reference. Check that the blade remains upright instead of leaning during the stroke.
The heel does not clear the food
Make sure you are lifting and resetting after each push cut. Avoid trying to pivot the entire edge continuously against the board.
Your hand becomes tired
Loosen the pinch grip and let the edge perform the cut. Excessive gripping pressure and forcing a dull blade both increase fatigue.
The tip catches the board
Reduce rocking and keep the pointed tip clear when resetting the knife. Never twist the blade to release a tip caught in food.
Care after every session
How to Protect Your Kiritsuke
Hand wash
Wash the knife carefully with mild dish soap and warm water. Do not leave it submerged in a sink.
Dry immediately
Dry the blade and handle completely after washing, particularly when the knife contains carbon steel.
Store separately
Use a saya, suitable knife block or secure magnetic holder that protects the edge and angled tip.
Sharpen correctly
Match the sharpening method to the knife’s actual bevel and manufacturer specifications.
Continue with our Japanese knife-care guide and sharpening-angle guide.
Continue learning
Related Yakushi Kiritsuke Guides
Kiritsuke buying guide
Understand blade length, profile, handle, steel and the practical questions to consider before choosing a kiritsuke.
Read the buying guide →Do you need a Kiritsuke?
Decide whether this profile fits your experience, preferred cutting motion and normal kitchen tasks.
Evaluate the Kiritsuke →Kiritsuke vs Santoku
Compare the longer, flatter kiritsuke profile with the compact and approachable santoku.
Compare the two knives →Japanese knife shapes
See how the kiritsuke relates to gyuto, santoku, nakiri, yanagiba and other Japanese knife profiles.
Explore knife shapes →Damascus Kiritsuke knife
View the Yakushi Damascus Kiritsuke and its product specifications.
View the Kiritsuke →Whetstone sharpening
Explore a water-stone option for maintaining Japanese kitchen knives with the appropriate technique.
View the whetstone →Independent references
Authoritative Technique and Safety Resources
These are educational and government resources. None are competing knife retailers.
How to Slice, Dice and Julienne provides an additional professional demonstration of foundational knife movements.
Safe Food Handling covers hand washing, cleaning work surfaces and preventing cross-contamination.
Safe Minimum Internal Temperature Chart provides official cooking-temperature guidance for meat, poultry, fish and leftovers.
Frequently asked questions
How to Use a Kiritsuke Knife FAQs
What is a Kiritsuke knife used for?
A kiritsuke is used for precise vegetable preparation, long slices through boneless proteins and detailed tip work. Its exact intended use depends on whether it is a traditional single-bevel kiritsuke or a modern double-bevel kiritsuke-style gyuto.
What is the best cutting motion for a Kiritsuke?
Controlled push cuts work well for vegetables, while long draw slices suit boneless proteins. The flatter profile is generally less suited to exaggerated rocking than a curved Western chef knife.
Can you rock chop with a Kiritsuke knife?
Some double-bevel versions allow a limited rocking motion, but forceful rocking is usually not the best use of the profile. Push cutting and slicing make better use of its flatter edge and reduce the chance of catching the pointed tip.
How should you hold a Kiritsuke knife?
Use a relaxed pinch grip near the junction of the blade and handle. Curl the fingertips of your guiding hand behind the knuckles and maintain a stable cutting board.
Can a beginner use a Kiritsuke?
A beginner can learn on a double-bevel kiritsuke-style gyuto, although its length, flatter edge and pointed tip require attention. A traditional single-bevel kiritsuke demands more specialized technique.
Can a Kiritsuke cut meat and fish?
Yes. It can make clean slices through boneless meat and fish. It should not be used to cut through bones, frozen proteins, shellfish shells or hard joints.
Why does a Kiritsuke have an angled tip?
The angled K-tip creates a precise point for detailed trimming, shallow scoring and accurate cuts. Because it is narrow, it should not be subjected to twisting or sideways pressure.
What cutting board should you use?
Use a stable wood or suitable synthetic cutting board. Avoid glass, stone, ceramic and other hard surfaces that can rapidly degrade a fine kitchen-knife edge.
How do you care for a Kiritsuke knife?
Hand wash it, dry it immediately and store it where the edge and tip cannot contact other utensils. Sharpen it according to its actual single- or double-bevel geometry.
What should you never cut with a Kiritsuke?
Avoid bones, frozen food, hard shells and materials that require prying or twisting. Use a tool designed for heavy-duty work instead of risking the thin edge or pointed tip.